27 Minutes
iOS App Clips: What They Are and How to Create One
Fix Bugs Faster! Log Collection Made Easy
App Clips are one of the most under-appreciated parts of the iOS universe.
Introduced with iOS 14 back in 2020, they allow users to sample the best features of an app without having to download it in full. Users explore the Apple ecosystem. Developers broaden their audience. Win-win, right?
Well, bizarrely few devs are actually using App Clips right now. A lot of folks think they’re going to be overly complex and full of friction. That’s a total misconception, and in this post we’ll put that straight.
We’re going to explain what App Clips are, show a real iOS App Clip example, and walk through how to create an App Clip in Xcode step by step.
Here’s how it will all shake down (click anywhere in the list to jump straight to that section).
What are iOS App Clips, exactly?
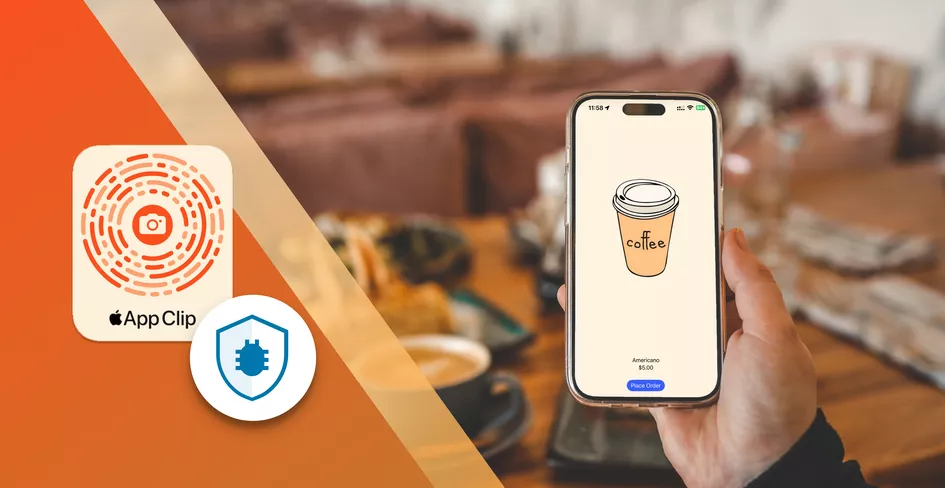
App Clips are tiny snippets of an iOS app built to perform one specific action, such as paying, booking, or ordering. They launch instantly on iPhone, run without eating into storage space and give users a focused mini-experience designed for quick completion.
How are App Clips accessed on iPhone?
Users can open App Clips through several built-in iOS entry points:
- Safari when visiting a supported URL.
- Maps from place cards that offer an App Clip experience.
- Messages when receiving a shared invocation link.
In real-world environments, App Clips can also be launched using:
- QR codes scanned with the camera.
- NFC tags activated by tapping the device.
- App Clip Codes which combine NFC and visual scanning for fast and reliable launches.
The key benefits of using App Clips
App Clips give app-builders a fantastic marketing tool and allow users to sample apps and products that they wouldn’t otherwise click. The granular benefits include:
- Higher discoverability since users can open a feature instantly without having to commit to the full app download.
- Lower friction because there is no App Store process, signup flow, or onboarding step.
- Less device storage required thanks to the lightweight size of each clip.
- Faster task completion since the user is guided directly to the action they want.
- A more focused experience with only the essential UI and logic needed for that moment.
iOS 17 updates to App Clips
App Clips were built to be accessible right out the gate, but Apple’s iOS 17 update multiplied their user-friendliness.
The update rolled out in September 2023 added way more accessibility features for App Clips and enabled users to access them by simply swiping left from their home screen and finding the corresponding App Clip card in the App Library. This meant it was no longer essential to scan QR codes, NFC tags or App Clip Codes, a big adoption roadblock.
Another iOS 17 addition, App Clip Suggestions, uses machine learning to predict which App Clips users are most likely to need in a certain context, then displays these suggestions on the lock screen or in the Siri suggestions widget.
Apple has continued to prioritize user convenience and accessibility with subsequent updates, including:
- New size limit – The maximum size of an App Clip is 100MB at the time of writing.
- Default app links – You can launch App Clips by visiting a URL, which is created automatically when App Clip experiences are built in App Store Connect.
https://appclip.apple.com/id?p=<bundle_id>&key=value. - Launch App Clips from any app – The addition of an API that can create a tappable App Clip preview for invocation. After retrieving metadata from LPMetadataProvider, the API provides the data to LPLinkView to render a preview, as shown in this handy chunk of code:
let lpProvider = LPMetadataProvider()

lpProvider.startFetchingMetadata(for: url) { (metadata, error) in
    guard let metadata = metadata else {
        return
    }

    DispatchQueue.main.async {
        lpView.metadata = metadata
    }
}- Launch App Clips from SwiftUI – The ability to launch an App Clip from SwiftUI by creating the URL with your bundle identifier, and adding the URL to a Link() in your SwiftUI, as follows:
var body: some View {
    let url = URL(
        string: "<https://appclip.apple.com/id?p=com.bugfender.costracoffee.CostraCoffee.clip>"
    )!

    Link("Backyard Birds", destination: url)
}- Launch app clip from
UIApplication– Enabling us to launch an App Clip from any UIKit-based app, like this:
func launchAppClip() {
    let url = URL(
        string: "<https://appclip.apple.com/id?p=com.bugfender.costracoffee.CostraCoffee.clip>"
    )!

    UIApplication.shared.open(url)
}
How to make an iOS App Clip in Xcode (step-by-step)
First, before jumping on the Xcode, let’s familiarise ourselves with an App Clip’s basic architecture and lifecycle.
iOS App Clip architecture overview

No matter what kind of App Clip you’re building, the building blocks of your project will essentially be the same.
- App Clip bundle – This standalone bundle contains the necessary assets, code, and resources for the App Clip to perform its specific function. Only components essential for the App Clip’s purpose are included, minimizing the storage you need.
- App Clip entitlements – The specific capabilities granted to the App Clip (such as access to location services or Apple Pay), required to support its functionality.
- App Clip identifier – A unique identifier that distinguishes it from other App Clips, allowing users to trigger its launch.
- App Clip target – A target within an Xcode project that contains the specific code and resources necessary for the App Clip. This is kept separate from the main app target so the clip stays lightweight.
- App Clip link – A deep link that directs users to the App Clip when clicked. It can be shared via messages, social media, or other channels.
- On-Demand resources – App Clips can utilize on-demand resources to load additional content dynamically when needed, minimizing the initial download size.
App Clip lifecycle and user flow

User flow is a core factor in all development projects but it’s particularly vital for App Clips. The whole point of these clips is to provide a smooth experience and funnel users towards the full app, so the UX has to be absolutely on-point.
Here are the key points for you to bear in mind.
- Invocation – The method by which the App Clip is triggered (e.g. scanning an NFC tag or clicking a link), starting the App Clip lifecycle. An invocation URL is the special URL that launches the snippet.
- App Clip card – When triggered, the system quickly launches the App Clip from the App Clip card, giving the user immediate access to its features.
- App Clip interface – The App Clip interface is presented after launch and is usually simple and focused on its function.
- Performing the function – The user triggers the App Clip to complete the function.
- Transitioning to the full app – If the user wants to access additional features or content beyond the App Clip’s possibilities, they can choose to transition to the full app. This transition is seamless, allowing users to continue their journey without interruption.
- Exiting the App Clip – Once the user completes (or abandons) their task and decides to exit the App Clip, the interface is dismissed. The system manages the clean-up procedure, releasing all resources.
- Background refresh – In some cases, App Clips may continue running in the background to support features like location updates or push notifications.
- Deactivation and termination – If the App Clip hasn’t been used for a long time or if system resources get low, the system may switch itself off or terminate the clip to make room for other jobs.
Now let’s build the iOS app that hosts your App Clip
As trailled earlier, we’ll be using a fictional coffee house chain, which we’ll call Costra Coffee.
Before we start, we’ll need to create an iOS app, after which we’ll be able to add our App Clip as a target.
We won’t go into detail on the creation of the iOS app, but the source code for both the app and the App Clip can be found at the end of the article.

Create your iOS app and App Clip target in Xcode
Just open the Xcode, create an app, and choose your name for the project – in our case CostraCoffee.
We chose SwiftUI and Swift for our project (rather than other Apple programming languages) as they offer a contemporary and effective way to construct user interfaces.

Next we’ll add a new target to the project and select the App Clip, as follows:


Our project structure should now look like this:

SwiftUI follows MVVM (Model, View, and View-Model) architecture and Xcode has a default view built in (ContentView), which is enough for us. Now, we’re going to create Coffee.swift (Model) and CoffeeModel.swift (ViewModel).
Coffee.swift has the struct Coffee, which conforms to the identifiable protocol (used to identify between different instances of a type. The confirming type often contains a unique ID).
We’ve also created an extension of the coffee struct, which returns a static list of coffee we need for our List.
Great! So we’ve completed our Model and next we’ll create our ViewModel.
import Foundation

struct Coffee: Identifiable {
    var id: String
    var name: String
    var price: Double
    var image: String
}

extension Coffee {
    static func list() -> [Coffee] {
        return [Coffee(id: "1", name: "Americano", price: 5.00, image: "coffee"), Coffee(id: "2", name: "Latte", price: 7.50, image: "coffee"),
                Coffee(id: "3", name: "Frappuccino", price: 8.00, image: "coffee"), Coffee(id: "4", name: "Iced Coffee", price: 7.99, image: "coffee")
        ]
    }
}
Our ViewModel class, CoffeeModel, publishes two variables whenever updated. These are:
- Function fetchCoffee updates the list variable with a static coffee list from the Coffee model.
- Function findCoffeeById updates the selectedItem variable with a Coffee object. It finds the object using its id.
final class CoffeeModel: ObservableObject {
    @Published public var list: [Coffee] = [Coffee]()
    @Published public var selectedItem: Coffee?

    public func fetchCoffee() {
        list = Coffee.list()
    }

    public func findCoffeeById(id: String) {
        let coffee = Coffee.list().filter { $0.id == id }
        selectedItem = coffee[0]
    }
}
Our List now displays coffee items fetched from CoffeeModel.
The most important part here is our model variable. This is a property wrapper which indicates that the view observes changes to the CoffeeModel instance and updates the View when the model changes.
import SwiftUI
import CoreData

struct ContentView: View {
    @ObservedObject private var model: CoffeeModel = CoffeeModel()

    var body: some View {
        VStack {
            Spacer()
            Image("costra_logo")
                .resizable()
                .frame(width:280, height: 106)
            List (self.model.list, id: \\.id) { item in
                HStack {
                    Image("coffee")
                        .resizable()
                        .frame(width: 50.0, height: 50.0)
                    VStack (alignment: .leading){
                        Text(item.name)
                        Text("\\(item.price, specifier: "$%.2f")")
                    }
                }
                .frame(height: 80)
                .listRowBackground(
                    RoundedRectangle(cornerRadius: 8)
                        .background(Color.clear)
                        .foregroundColor(Color("list_item_bg"))
                        .padding(
                            EdgeInsets(
                                top: 5,
                                leading: 5,
                                bottom: 5,
                                trailing: 5
                            )
                        )
                )
                .listRowSeparator(.hidden)
            }
            .scrollContentBackground(.hidden)
            .background(Color("body"))
            .onAppear(perform: {
                model.fetchCoffee()
            })
        }
        .background(Color("body"))
    }

}
Now we can select the CostraCoffee scheme and run the project on a simulator or device to see the changes.

Awesome! We should now see our list of coffees. But if something’s not right, no dramas: we can check the console for any errors and resolve them.

Next we need to share our Model and ViewModel with our App Clip, and to do so we’ll need to update both files’ target membership to CostraClip.
This ensures both the Model and ViewModel are accessible to the App Clip and can be shared in both.
Once the target membership is updated, we can proceed with integrating the Model and ViewModel into our App Clip.

Implement the App Clip entry point
In the App Clip section, the swift file CostraClipApp.swift is going to be the main entry point of our App Clip target.
We’re using the same model we previously shared with our app and on line 12, we declared @StateObject private var model = CoffeeModel().
We’ll also share this variable with ContentView’s environmentObject modifier.
ContentView registers the onContinueUserActivity function. This is where we get the user activity the App Clip receives, such as the invocation URL.
import SwiftUI

@main
struct CostraClipApp: App {
    @StateObject private var model = CoffeeModel()

    var body: some Scene {
        WindowGroup {
            ContentView()
            .environmentObject(model)
            .onContinueUserActivity(NSUserActivityTypeBrowsingWeb, perform: handleUserActivity)
        }
    }

    func handleUserActivity(_ userActivity: NSUserActivity) {
        if let webpage = userActivity.webpageURL {
            let coffeeId = webpage.lastPathComponent
            if !coffeeId.isEmpty {
                print("new coffee id: \\(coffeeId)")
                model.findCoffeeById(id: coffeeId)
            }
        }
    }
}
The function handleUserActivity checks whether we have received a URL https://costracoffee.com/1, and whether it includes our coffee ID. If our model finds the coffee by its ID, our ContentView will display the coffee and price.
import SwiftUI

struct ContentView: View {
    @EnvironmentObject private var model: CoffeeModel

    var body: some View {
        VStack {
            Spacer()
            Image("coffee")
                .resizable()
                .scaledToFit()
                .frame(maxHeight: 300)
            Spacer()
            Text(model.selectedItem?.name ?? "Coffee not found")
            Text("\\(model.selectedItem?.price ?? 0.0, specifier: "$%.2f")")
            Button("Place Order") {}
                    .buttonStyle(.borderedProminent)
                    .tint(Color("button_bg"))
                    .controlSize(.regular)
                    .cornerRadius(40, antialiased: true)
                    .padding()
        }

        .frame(
              minWidth: 0,
              maxWidth: .infinity,
              minHeight: 0,
              maxHeight: .infinity,
              alignment: .center
        )
        .ignoresSafeArea(.container, edges:.top)
        .background(Color("body"))
    }
}
Before running the App Clip, we’ll need to set the invocation URL in our scheme. To do this we’ll select the App Clip scheme and set the invocation URL https://costracoffee.com/1 under the Arguments tab.

Now we just select the CostraClip scheme to run the App Clip.


Clip shipped! We’ve created our Costra Coffee app and App Clip. Pretty straightforward, I’m sure you’ll agree.
How to launch an App Clip on iPhone
As we know, App Clips can be initiated through QR codes, NFC tags and App Clip Codes as well as by web association.
In truth this bit’s pretty simple: We can generate an App Clip Code or NFC by using the AppClipGenerator tool, which is available from the Apple Developer Resources site (https://developer.apple.com/app-clips/resources/).

Generate App Clip Codes
To generate an App Clip Code, we’ll need to encode our URL (https://costracoffee.com/1) by running the following command on our terminal and saving the App Clip .svg file in the Downloads directory.
AppClipCodeGenerator generate --url <https://costracoffee.com/1> --foreground FF5500 --background FEF3DE --output ~/Downloads/americano.svg
If you want a bit more context, the video below shows how to launch the App Clip on a real device by opening the camera and capturing the App Clip Code generated in the Downloads directory.
Again, NFC tags are a breeze. Simply encode the same URL to create the tag, like this:
AppClipCodeGenerator generate --url <https://costracoffee.com/1> --foreground FF5500 --background FEF3DE --type nfc --output ~/Downloads/americanonfc.svgWeb association
Invocation URLs
These work slightly differently to App Clip Codes and NFC tags.
They check the invocation URL against your website and the App Clip’s code signature for an associated domains entitlement (more of which below). The system checks that the domain server agrees to run the App Clip by referencing it in an Apple App Site Association (AASA) file.
Associated domains’ entitlement
To associate our App Clip with our website, we’ll need to add the Associated Domains Entitlement to the app and App Clip targets. This entitlement allows the app and App Clip to communicate with the server hosting the AASA file.
To do this, we open our project in Xcode, then in Project Settings we enable the Associated Domains capability and add the Associated Domains Entitlement.

Server connectivity
This step is easy to forget, but we’ve got to include it: Our App Clip can only connect to the server (and the system can only check the URL that calls it) if we make some tweaks.
To make an AASA file, we’ll use the appclips key to add an App Clip entry.
In this example, we’ll place an AASA file in the .well-known directories for each URL’s domain in our server root directory.
{
    "appclips": {
        "apps": ["ABCDE12345.com.bugfender.costracoffee.CostraCoffee.Clip"]
    }
}
Now we know how to set up access to our App Clip, which means we’ve covered all the 101s (and the 102s, 103s and 104s).
Now we’ve done the basics, let’s go a little bit deeper under the hood and explore some techniques that will really make our App Clips fly.
Advanced App Clip techniques
Enable notifications in an App Clip
Some App Clips may need to schedule or receive notifications (e.g. upcoming coffee order deliveries) to optimise user experience.
To enable notifications, create the key ‘Requests ephemeral user notifications’ in your App Clip’s Info.plist file and set its value to ‘YES’.

Now we’ll write a simple function to verify whether the App Clip can schedule and receive notifications, and whether the user has granted short-term notification permission. Add the below code to your CostraClipApp:
func requestAuthorizationForNotification() {
      let nc = UNUserNotificationCenter.current()
        nc.getNotificationSettings { setting in

        if setting.authorizationStatus == .ephemeral {
            print("permsission")
            return
        }

        nc.requestAuthorization(options: .alert) { result, error  in
              print("Result: \\(result)  \\(String(describing: error))")
        }
      }
    }
Location verification
To enable location in our App Clip, we need to modify the Info.plist file and set key ‘Requests location confirmation’. Here’s how it’s done:

After we’ve modified the Info.plist file, we can add code to provide the expected physical location information to the App Clip.
To retrieve this information, we’ll encode an identifier in the URL that launches the App Clip, and use the identifier to look up the location information for a business in our database.
Upon launch, access the location information and use it to create a CLCircularRegion object with a radius of up to 100 meters and pass it to the confirmAcquired(in:completionHandler:) function.
Good stuff! Now, when a user opens the App Clip, this code will check to see where they are.
guard
            let incomingURL = userActivity.webpageURL,
            let components = NSURLComponents(url: incomingURL, resolvingAgainstBaseURL: true),
            let queryItems = components.queryItems
        else {
            return
        }

        guard
            let payload = userActivity.appClipActivationPayload,
            let latitudeValue = queryItems.first(where: { $0.name == "latitude" })?.value,
            let longitudeValue = queryItems.first(where: { $0.name == "longitude" })?.value,
            let latitude = Double(latitudeValue),
            let longitude = Double(longitudeValue)
        else {
            return
        }

        let c = CLLocationCoordinate2D(latitude: latitude, longitude: longitude)
        let r = CLCircularRegion(center: c, radius: 100, identifier: "coffee_location")

        payload.confirmAcquired(in: r) { region, error in
            if let error = error {
                print(error.localizedDescription)
                return
            }

            DispatchQueue.main.async {
                // Do something
            }
        }
Another great thing about App Clips is that they can be shared with friends and family using a special link, making it easier for users to recommend a business to others and increase its potential customer base through word of mouth.
To launch the App Clip from any view in SwiftUI, here’s the code:
var body: some View {
    let appClipURL = URL(
        string: "<https://appclip.apple.com/id?p=com.bugfender.costracoffee.CostraCoffee.Clip>"
    )!

    Link("CostraCoffee", destination: appClipURL)
}
Testing App Clips
So now we can create App Clips that perform some pretty complex functions. But here’s the really crucial bit.
App Clips don’t get a second chance at a first impression, and even a small glitch will color a user’s entire view of their parent brand. So we’ve gotta get the testing part right.
We can test our iOS App Clip on both a simulator and a real device to verify that the clip launches correctly on iPhone and handles App Clip URLs as expected.
Testing invocation on a simulator with the _XCAppClipURL environment variable
We want our App Clip to launch without a hitch so we need to make sure we have a functional invocation URL. It’s essential we test the code thoroughly, including debugging the invocation URL in Xcode.
Here’s how to configure an invocation URL for our App Clip example, so iOS knows which part of the app to load.
Note that we’re using https://costracoffee.com/2 – this will launch our Costra Coffee App Clip showing the coffee, and the ID is 2:
- Modify the scheme for our App Clip in Xcode by navigating to Product > Scheme > Edit Scheme.
- Verify that the _XCAppClipURL environment variable is present in the Arguments tab.
- Add the URL of the invocation we want to test into the environment variable.
- Put a checkmark next to the variable to make it active.
- Run the App Clip on Xcode – the simulator should display our App Clip.

Testing invocation with a local experience on a real device
We can also test App Clip invocation on a real iPhone using a Local Experience, which is useful when validating deep links, App Clip codes, and context-based launches. Here’s how:
- Build and run our App Clip on a test device to make sure it’s cached. We’ll need to run the CostraCoffee App Clip first.
- On the test device, open Settings and navigate to the iOS developer settings by choosing Developer > Local Experiences, then select ‘Register Local Experience’.
- Enter the invocation URL we want to test – in our case: https://costracoffee.com/1.
- Enter the bundle ID of the App Clip.
- Provide a title and a subtitle.
- Select an Action, for example
Open.

- Use the camera on the test device to scan the App Clip Code and click the title to launch the App Clip.

Quick summary
We’ve barely scratched the surface of what App Clips can do for us, giving thousands if not millions of iOS users a ‘sneak peak’ of our projects without eating into their storage space.
Hopefully this article has given you all you need to weave App Clips into your developer’s repertoire. Here are some core ideas to take away:
- App Clips can be accessed by scanning QR codes, NFC tags, dedicated App Clip Codes or by web association via an invocation URL.
- As they are part of an app they are created in the same Xcode project as the full app – we recommended using SwiftUI and Swift .
- App Clips can perform a range of functions, from basic transactions to more complex location and notification-based services.
- App Clips can be tested in both simulators and test devices to ensure they perform properly in different environments.
Like all coding puzzles, the more you experiment with App Clips the better you’ll understand their capabilities and be able to maximize their potential.
FAQ – iOS App Clips on iPhone for developers
What is the maximum size of an iOS App Clip now?
App Clips can be up to 50MB when launched digitally and 15MB when launched via QR code, NFC tag, or App Clip Code, so we must keep assets lean.
We keep shared models, view models, and resources in common targets or frameworks, then enable target membership for the App Clip so it reuses the same Swift/SwiftUI code.
How do we pass data into an App Clip with URLs?
We encode identifiers (like a coffee ID or location parameters) in the invocation URL, read them from NSUserActivity.webpageURL, then use that data in our models or view models.
Can an App Clip use notifications and location?
Yes. We enable the dedicated Info.plist keys (ephemeral notifications and location confirmation), request permissions at runtime, then use UNUserNotificationCenter and Core Location APIs.
How do we launch an App Clip from SwiftUI or UIKit?
We create the App Clip URL (for example, the appclip.apple.com link) and open it via Link in SwiftUI or UIApplication.shared.open(_:) in UIKit to show the App Clip card.
How do we test App Clip invocation on simulator and real devices?
On the simulator, we set _XCAppClipURL in the scheme’s environment variables. On a device, we register a Local Experience in Developer Settings and use an App Clip Code or URL.
Want the full source code?
Download it here: https://github.com/bugfender-contrib/costra-coffee
Expect The Unexpected!
Debug Faster With Bugfender

Aleix Ventayol
Aleix Ventayol is CEO and co-founder of Bugfender, with 20 years' experience building apps and solutions for clients like AVG, Qustodio, Primavera Sound and Levi's. As a former CTO and full-stack developer, Aleix is passionate about building tools that solve the real problems of app development and help teams build better software.